GitLab has a built-in CI/CD mechanism for continuous integration and continuous delivery. It’s straightforward: every time you push code into your repository, you can run a configurable sequence of steps to test your code, run linting and syntax validations, run integration tests, and finally deploy your code to your dev/stage/production environments.
What is GitLab CI/CD?
If you’re familiar with Bitbucket Pipelines or GitHub actions, the principle remains the same. However, I realize that GitLab has a lot more options to offer that other SaaS-based Git offerings. If you’re new to GitLab or CI/CD in general, GitLab has a helpful overview aimed at beginners.
In this tutorial, I’ll walk you through building a Dockerfile and pushing it to DockerHub.
For reference, I’ll use my Tweet-Toot project. Tweet-Toot is a Python project that relays tweets from a Twitter account to a Mastodon instance. It uses Python to do the heavy lifting and Docker to package the application. And because I’m developing the project by myself, an automated workflow to publish new images is extremely helpful.
Writing the Dockerfile
This is Tweet-Toot’s Dockerfile:
# Docker image for Tweet-Toot project.
FROM python:3.7-alpine
LABEL Author="ayush@example.com"

COPY . /tweet-toot

WORKDIR /tweet-toot

RUN pip3 install -r requirements.txt

CMD ["python3", "run.py"]
The Dockerfile is simple enough: it copies the source code into the container, installs the Python requirements, and adds the main executable to CMD.
Writing the CI/CD file
GitLab Pipelines, like other CI/CD tools, work on principle I described above:
- define a trigger point (creating a tag, pushing to a branch, committing new code, etc.)
- prepare a throwaway base environment
- define a series of steps to execute on the above trigger
To declare the above steps, we need to create GitLab’s standard CI/CD file named .gitlab-ci.yml (similar to bitbucket-pipelines.yml in Bitbucket). To build and push a Docker image, I’ve used the following code:
docker-build-and-push:
  image: docker:latest
  stage: build
  services:
    - docker:dind
  before_script:
    - echo $MY_REGISTRY_USER; echo $MY_REGISTRY_IMAGE; echo $MY_REGISTRY
    - docker login -u "$MY_REGISTRY_USER" -p "$MY_REGISTRY_PASSWORD" $MY_REGISTRY
  script:
    - docker build --pull -t "$MY_REGISTRY_IMAGE:$CI_COMMIT_TAG" -f Dockerfile tweet-toot
    - docker push "$MY_REGISTRY_IMAGE:$CI_COMMIT_TAG"
  only:
    - tags
Let’s review the above steps one by one:
image: docker:latesttells GitLab to run our Pipeline within an image with the latest version of Docker installed. This image contains everything required to run the Docker daemon so that we can build and push our Docker images.stage: buildsets the GitLab Stage for this build. You can define multiple stages in your Pipelines for more advanced multi-stage builds, but we’ll keep ours simple.docker:dindstarts the Docker daemon as its entry point.before_scriptexecutes before our main script. We’re using this section to authenticate with DockerHub using the secrets we configured earlier.scriptcontains the main code. This is the meat of our CD pipeline where we’re building our Docker image and pushing it to DockerHub.onlycontains the main trigger point I talked about earlier. In this case, GitLab executes our Pipeline when we create a new tag. There are many other options available.
GitLab will execute the above Pipeline when we create a new tag like this.
Defining the Secrets
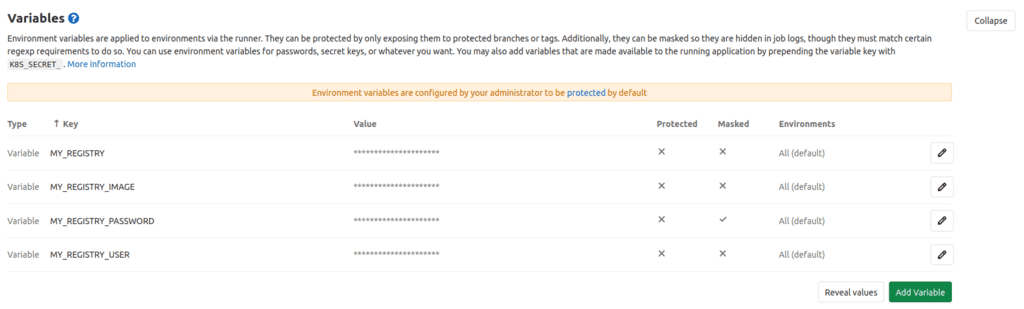
You’ll notice in the above file that we’re using several variables. There are two kinds available in GitLab.
There are pre-defined environment variables that are always available within your Pipeline. For example, the CI_COMMIT_TAG variable contains the name of the tag that triggered the build, which is useful to tag Docker images. You can find a full list of environment variables here.
Then there are user-defined secrets. These are encrypted key-value pairs that you can use within your Pipelines. In our case,
Triggering our Pipeline
As you can see, the build Pipeline triggered after the creation of tag 3.0…
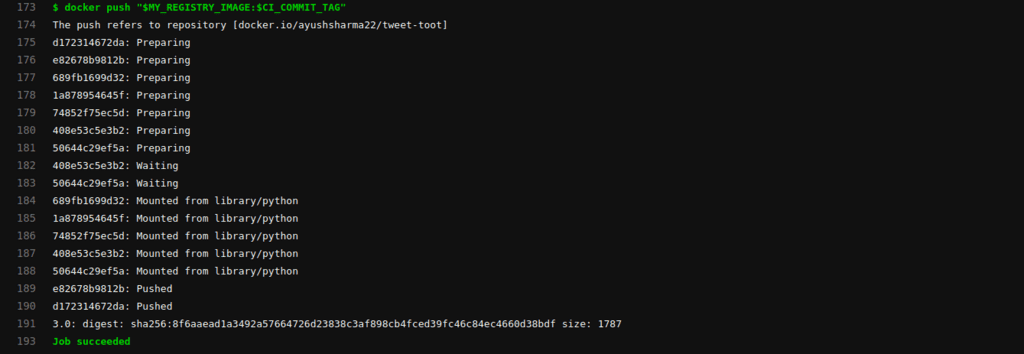
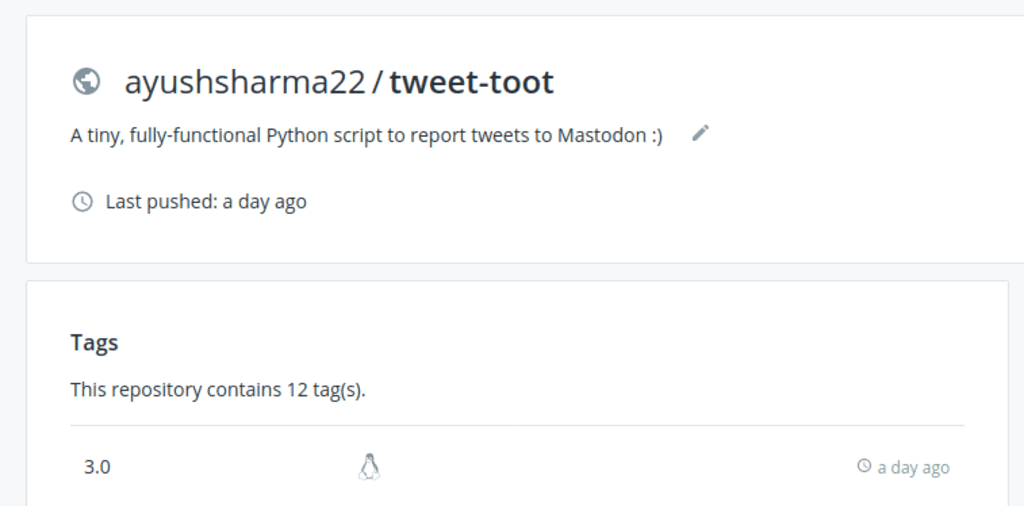
… and the resulting Docker image was pushed to DockerHub.
Conclusion
GitLab follows a similar CI/CD philosophy to the other SaaS-based solutions:
- Define a trigger point for your workflow.
- Define the environment for your build.
- Define the sequence of steps to execute on the above trigger.
The above principles are useful to understand the essential workings of GitHub actions and Bitbucket Pipelines as well.
You can also check out the resources section below links to GitLab’s intro docs.