In a typical push-based deployment, tools like Ansible, Jenkins, etc., connect directly to the server or cluster and execute the provisioning commands. This approach works well when the cluster is accessible on the network, and there is direct connectivity between our deployment server and the destination server. For compliance or security reasons, connectivity between the deployment tool and the cluster may not be possible.
ArgoCD is a pull-based deployment tool. It watches a remote Git repository for new or updated Manifest files and synchronises those changes with the cluster. By managing Manifests in Git and syncing them with the cluster, we get all of the advantages of a Git-based workflow (version control, pull-request reviews, transparency in collaboration, etc.) and a one-to-one mapping between what is in the Git repo and what is deployed in the cluster. This method is called GitOps.
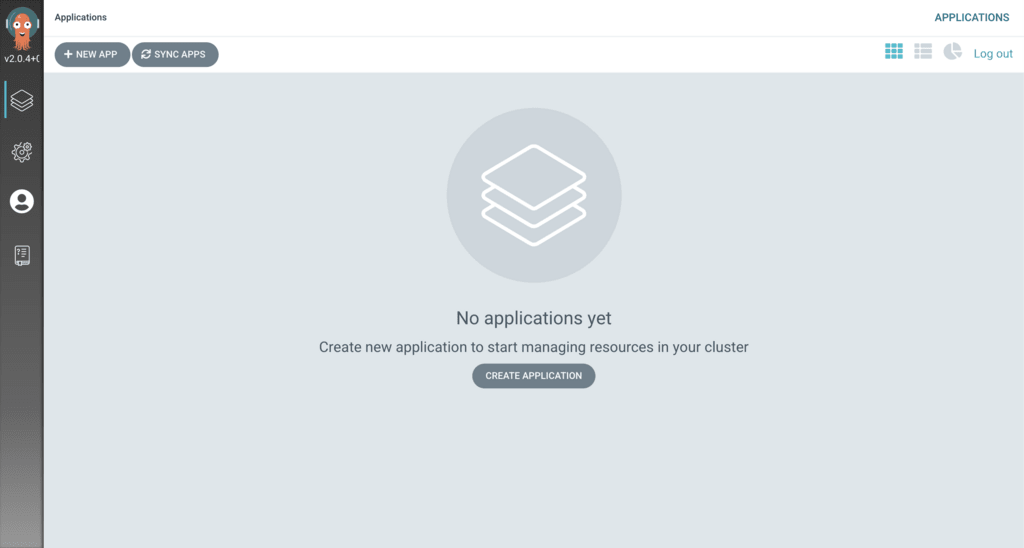
In this tutorial, I’m going to do the following:
- Install ArgoCD on a Minikube installation.
- Create a sample ArgoCD application called
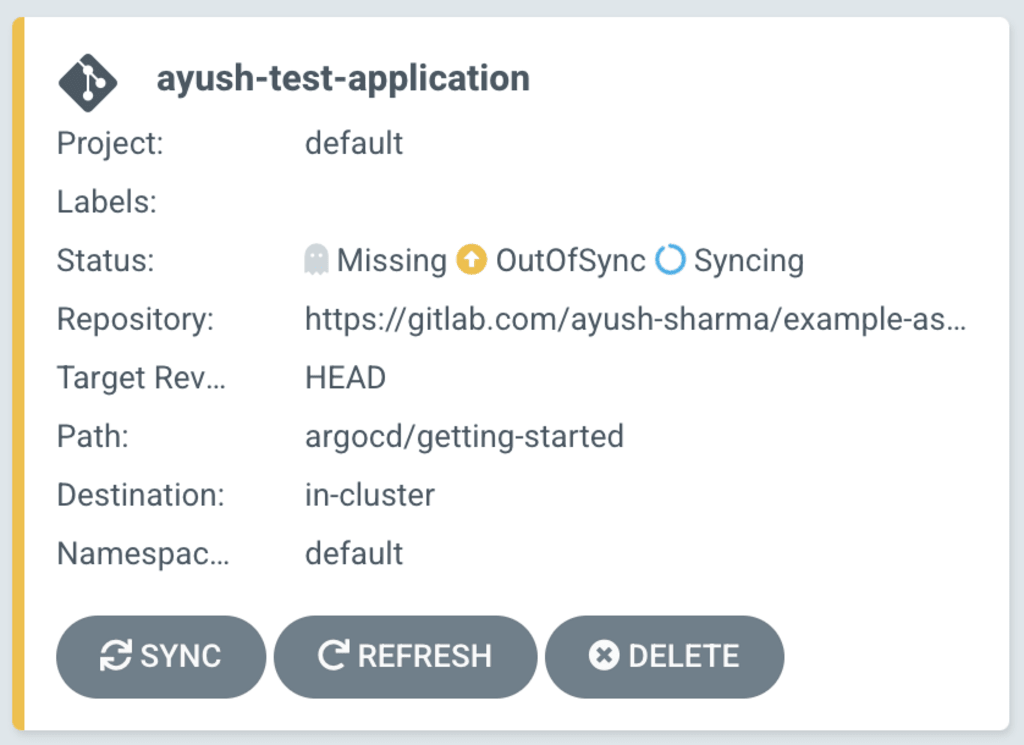
ayush-test-applicationand link it with my repoayush-sharma/example-assets. - Create and Nginx deployment with 3 replicas.
- Ensure the new application shows up on the ArgoCD dashboard and verify it using
kubectl.
Installing ArgoCD
For this tutorial, I’m using Minikube version: v1.21.0. You can download and install Minikube from here.
With Minikube up and running, we’re going to install ArgoCD. The ArgoCD documentation contains detailed steps on how to install and configure it for any cluster. Once you’ve executed those steps, make sure to run minikube tunnel in a separate terminal window to ensure Minikube exposes the ArgoCD Server’s load balancer endpoint on your local system. To verify this, run kubectl get po -n argocd and check if the argo-server service has an EXTERNAL-IP:
user@system ~ kubectl get svc -n argocd
NAME                    TYPE           CLUSTER-IP      EXTERNAL-IP     PORT(S)                      AGE
argocd-dex-server       ClusterIP      10.110.2.52     <none>          5556/TCP,5557/TCP,5558/TCP   3h32m
argocd-metrics          ClusterIP      10.100.73.57    <none>          8082/TCP                     3h32m
argocd-redis            ClusterIP      10.104.11.24    <none>          6379/TCP                     3h32m
argocd-repo-server      ClusterIP      10.100.132.53   <none>          8081/TCP,8084/TCP            3h32m
argocd-server           LoadBalancer   10.98.182.198   10.98.182.198   80:32746/TCP,443:31353/TCP   3h32m
argocd-server-metrics   ClusterIP      10.105.182.52   <none>          8083/TCP                     3h32m
Once the installation is complete and the load balanacer is working, the ArgoCD UI will be accessible at the EXTERNAL IP.
Creating the first application
Before we can talk about ArgoCD deployments we need to ensure that a Git repo with a K8s manifest file ready to deploy. I’m using my public repo example-assets with an Nginx deployment manifest file in /argocd/getting-started.
Our goal is to get ArgoCD to listen to the K8s manifest file above for changes and then sync them with the cluster it is deployed in, in this case, Minikube. We do this by creating an Application containing information about the Manifest files’ source repo, destination cluster details, and synchronisation policies.
Click New App on the top left to configure a new Application. Since my destination Kubernetes server is the one ArgoCD is installed on (Minikube), I will leave the server defaults as-is. These are the values I configured:
- Application Name:
ayush-test-application - Project:
default - Sync Policy:
automated - Sync Options:
prune: true; selfHeal: true - Source Repository URL:
https://gitlab.com/ayush-sharma/example-assets.git - Source Revision:
HEAD - Source Path:
argocd/getting-started - Destination Cluster URL:
https://kubernetes.default.svc - Destination Namespace:
default
To make things easier, you can click EDIT AS YAML on the top-right and paste the following:
apiVersion: argoproj.io/v1alpha1
kind: Application
metadata:
  name: ayush-test-application
spec:
  destination:
    name: 'default'
    namespace: default
    server: 'https://kubernetes.default.svc'
  source:
    path: argocd/getting-started
    repoURL: 'https://gitlab.com/ayush-sharma/example-assets.git'
    targetRevision: HEAD
  project: default
  syncPolicy:
    automated:
      prune: true
      selfHeal: true
Your configuration should look like this:

After saving the configuration, your Application should show up as a card on the home page. Since we specified the sync policy as Automated our new Application will begin syncing with the repo immediately.
Creating the Nginx deployment
In this tutorial, my manifest file is a standard Nginx deployment with 3 replicas. Once ayush-test-application completes syncing, ArgoCD will display a nice graphical view of the deployment like this:

Now let me verify the deployment using kubectl get po:
NAME                               READY   STATUS    RESTARTS   AGE
nginx-deployment-585449566-584cj   1/1     Running   0          5m
nginx-deployment-585449566-6qn2z   1/1     Running   0          5m
nginx-deployment-585449566-d9fm2   1/1     Running   0          5m
Conclusion
ArgoCD is a relatively light-weight and more secure approach to K8s deployments. I’m especially fond of the one-to-one relationship between what’s in the repo and what’s in the cluster making incident management a lot simpler.
Another big advantage is that since our Git repo contains everything ArgoCD requires, we could delete the entire ArgoCD installation and set things up from scratch. Meaning that bringing up a second identical cluster with all our workload deployed is now more feasible and practical in the event of a catastrophic outage.
A third big advantage is security: since ArgoCD pulls changes from a remote Git repo, there is no need to define firewall rules and VPC peering connections to get our deployment servers to connect with our cluster, which is one less point of entry. This reduces the attack surface area for our dev/QA/prod servers significantly.
Since the Git repo and branch name is configurable, you can get creative with deployment models. For example, you could have 2 different ArgoCDs running on 2 different QA and prod clusters listening to the same repo’s branch. This guarantees that the same Manifest file is deployed on both clusters, ensuring QA and prod environments contain the same codebase. Also, a single ArgoCD is capable of targeting multiple servers, meaning a hub-and-spoke deployment model is possible, where one Master ArgoCD orchestrates deployments across multiple dev, QA, and prod clusters in different regions/environments.
I hope this tutorial was informative. Get creative with ArgoCD, and don’t forget to share your experiments with others.
Happy coding :)