Most people can finish this game easy, by nuking the Kremlin. But almost all gamers are of the opinion that you can’t take out the Kremlin using ground units: there are just two many Yuris surrounding it to do anything. Here’s to proving them wrong…
Just like Chrono Storm, this map requires a hasty beginning and planning, after which you can pretty much relax and watch as your base takes care of itself. I’m not kidding. Look at the images below. In the hour that I took to lavishly play this level, not one tank or Conscript entered my base. Not one! The only time I heard “Our base is under attack” was when damaged Kirovs would fall out of the sky and onto my units: strategy hell, I tell you. I’ll also tell you how to finish this game, and attack Yuri’s outpost to the North with ground units, which is very heavily guarded. You won’t get much by it, but it is just for the unadulterated fun of this game. Just so you know, with a base like I set up, you can take out the Kremlin with two or three nukes without interference from enemy units.
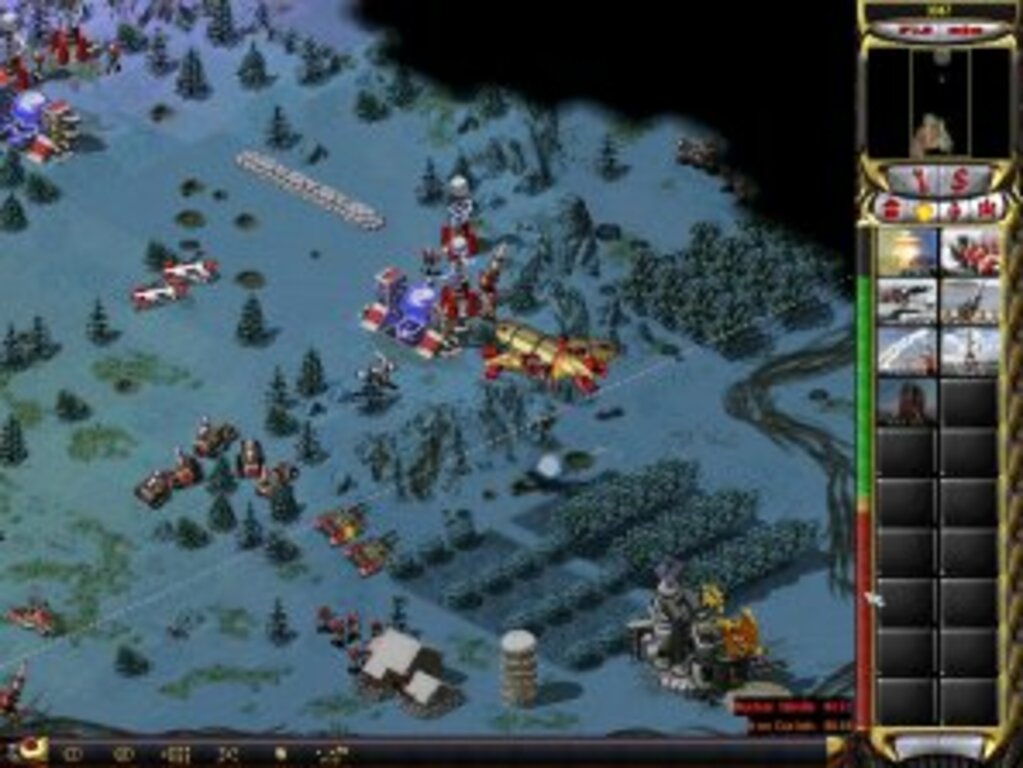
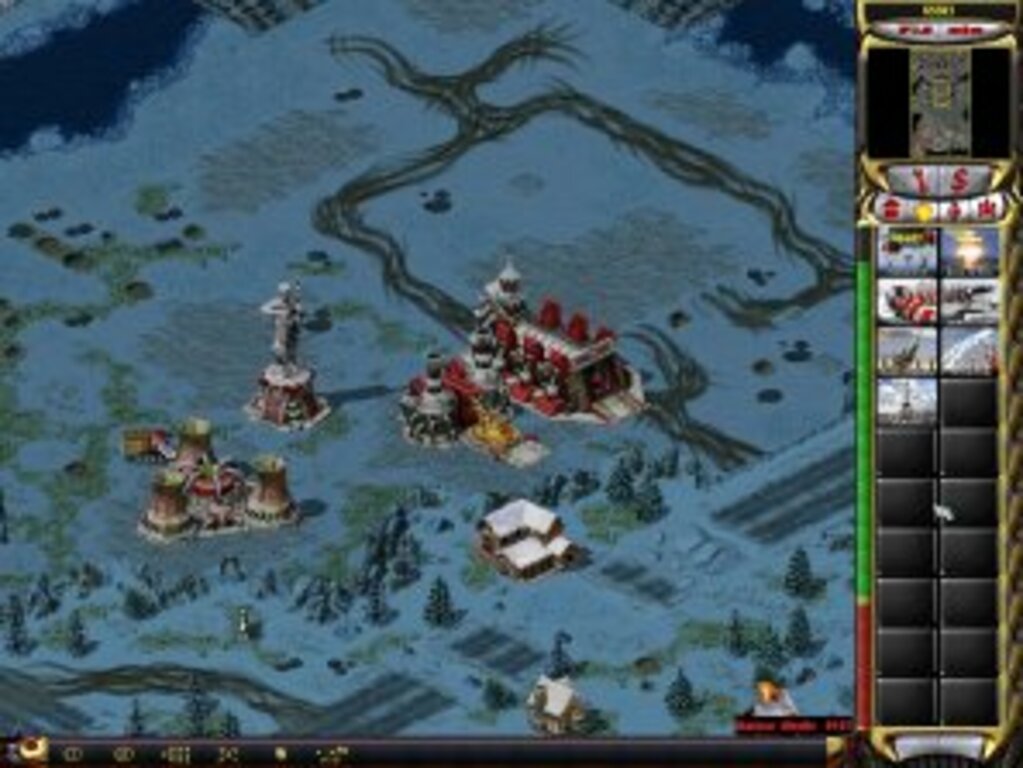
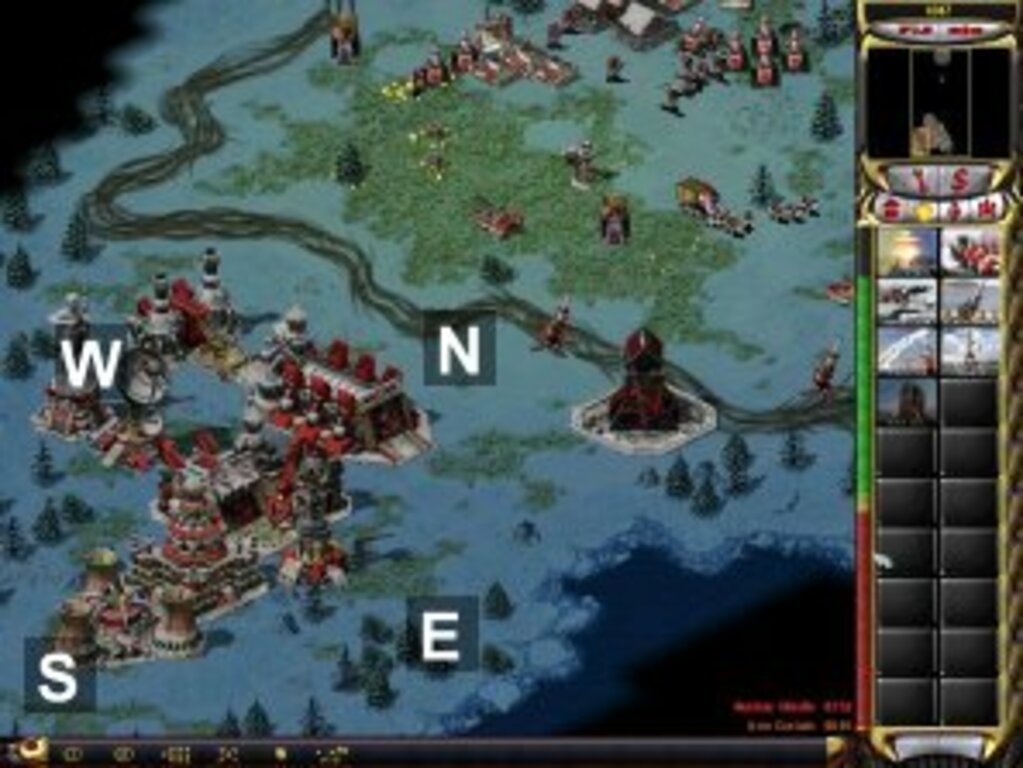
As again with Chrono Storm, we’ll start by clearing up two things. First, save the game as soon as you gain control, and close it. Read this write-up first, then you can experiment as you please. Second, we need to get directions cleared up. Taking our base as reference, I’ve marked North, South, East and West in figure 1. As you can see, North-east is actually East in practice. But we won’t muck about with all of that. From now on, directions ARE with reference to our base, as in figure 1.
Now, then. Let’s begin.
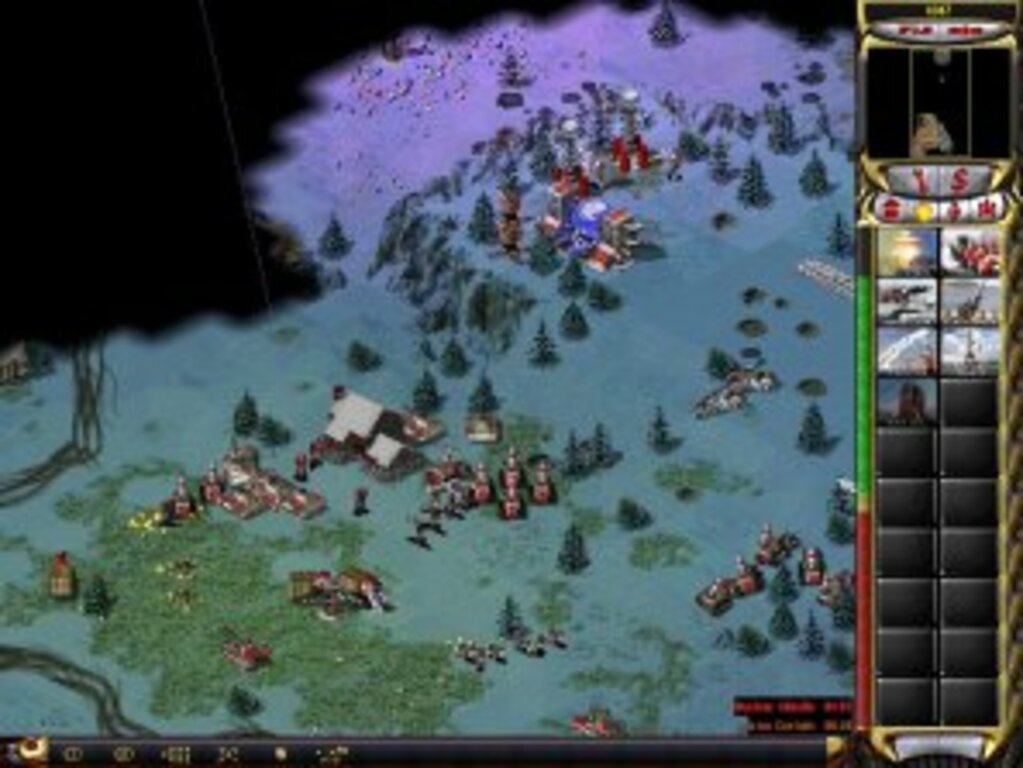
First things first. Just as you gain control, move your tanks and Conscripts to the North, and take out the few enemy Conscripts that are there, along with a Tesla Coil and two Flak cannons. Do not destroy the Tesla reactors. Start building your base, and place buildings close to the MCV. Your base should be compact, not rambling. Take the two Kirovs, and fly them North-west. Just below the Tesla reactor, there will be a small gully (figure 4). With the Kirovs selected, press and hold control, and tell them to attack the ground somewhere there itself. The Kirovs will destroy almost 99% of any and all enemy units! Place two tanks just as the gully ends. Eventually, replace these two tanks with Apocalypse Tanks (after this, I will refer to Apocalypse Tanks as ATs, for simplicity). On the left side (figure 3), garrison your Conscripts in the hut closest to your base, and let the tanks surround this hut. Capture the two Tesla reactors that I mentioned earlier, and build two Flak cannons and two Tesla coils each near them (figure 3 and 4). Also, build 5 Flak Traks and 5 Flak troopers, and move them near each of the Tesla reactors to ward off future Kirov attacks.
When you’re through with all of this, you’re set. Congratulations on building up the most impenetrable base known to man (well, to anyone playing the game, anyway)! Just place two ATs at the end of the North-west gully, and they’ll become Elite in no time, as will your two Kirovs.
Now all you have got to do is build ten ATs, a Flak Trak and an Engineer. There’s no hurry; your base isn’t threatened, and you can sit back and watch. If you’ve got even five ATs ready, build the Flak Trak and the Engineer, put the Engineer in the Flak Trak, and move out…
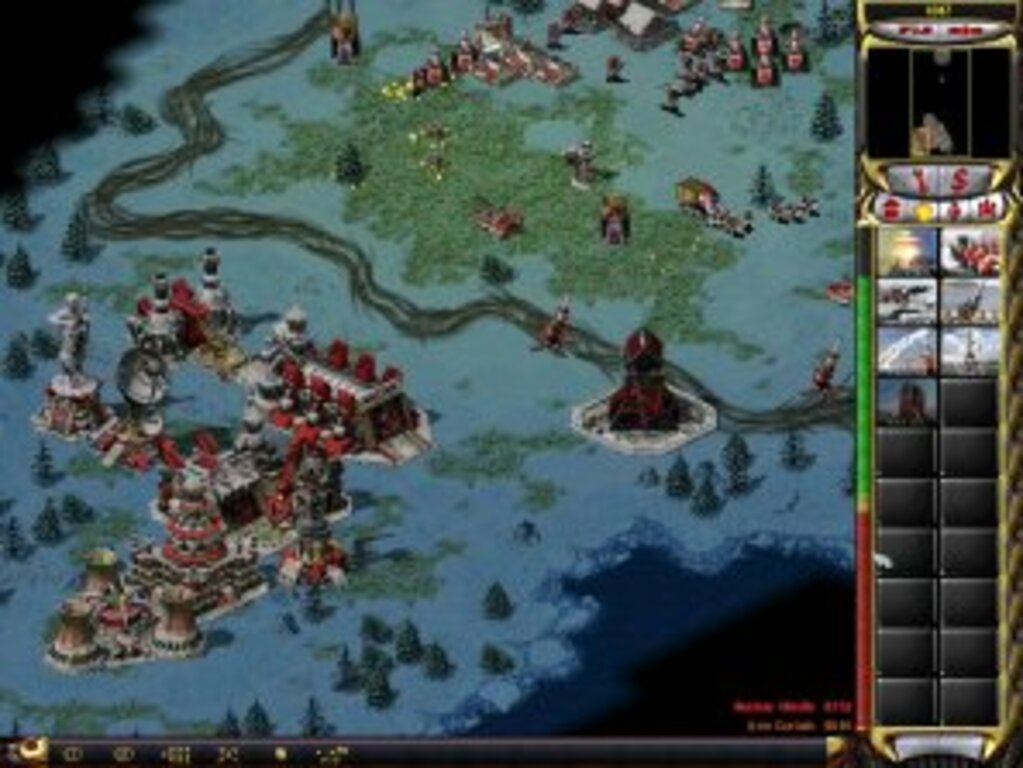
Select your AT-FLAK TRAK combo, and move further North-west. In figure 1, you can see a water body, right? Move North-west along its border, and you’ll eventually reach an Oil Derrick (figure 5)… notice another gully-thing between the two plateaus. DO NOT go further North, there’s a big enemy base there. Instead, take your Engineer, and capture an Air Field somewhere south of your current location. There are a few Flak cannons and coils in this area. With the Air Field captured, select your ATs, and move North. Before this, make sure you have ten ATs. Not that five aren’t enough, but just in case. One note: keep building ATs, have at least ten spare, other than the ones that are fighting. When you move North from the gully, you will be confronted with roughly two enemy ATs, five normal tanks, a dozen Conscripts, two coils, two sentry guns, and the enemy War Factory and MCV. They also have two Nuke reactors here. Your ATs, five or ten, should be able to cut through this, and some will probably have become Elite as well. From your current position, you are faced with two choices: you can go up a ramp, or crawl under a bridge. DO NOT go from under the bridge yet, as there are lots of Yuris there. Take about four or five ATs, and head up the ramp: sweep Eastward, clearing out coils and Flak cannons on the way. You’ll eventually come to a slope, which is going down. Just let your ATs stand at the end of the slope. You will have noticed a bridge going North when you just climbed the ramp (when I told you not to crawl from under it). Take a few Conscripts and let them go as far North on the bridge as possible: the idea is to give you some line of sight into the enemy base. If you can see two War Factories, it’s time for a nuke! Launch your Nuke and take out the factories, and then you can advance into the base: gather your units from under the bridge, and strike! One thing: don’t destroy the Refinery and the Nuke reactor here: capture these and build a new base here. Destroy the Iron Curtain. This area will now look something like figure 6.
You have destroyed the main enemy base, pretty much. You can order your Kirovs to stop firing, and you can also call all your ground units to your new base. No more threats for you. Use Engineers to capture about five or six Oil Derricks, and a few other tech buildings, and you should be rolling in money/credits. You can take out the Kremlin with Nukes now, or you may proceed further…
In your new base, you will see two bridges going over a lake: one to the East, and another to the North. Build a Terror Drone, and set it off on the two paths, for exploring the area. STAY behind the buildings at all times, or the coils will get you. The enemy now has mostly Yuris and coils, and almost no ground units (none that I can think of).
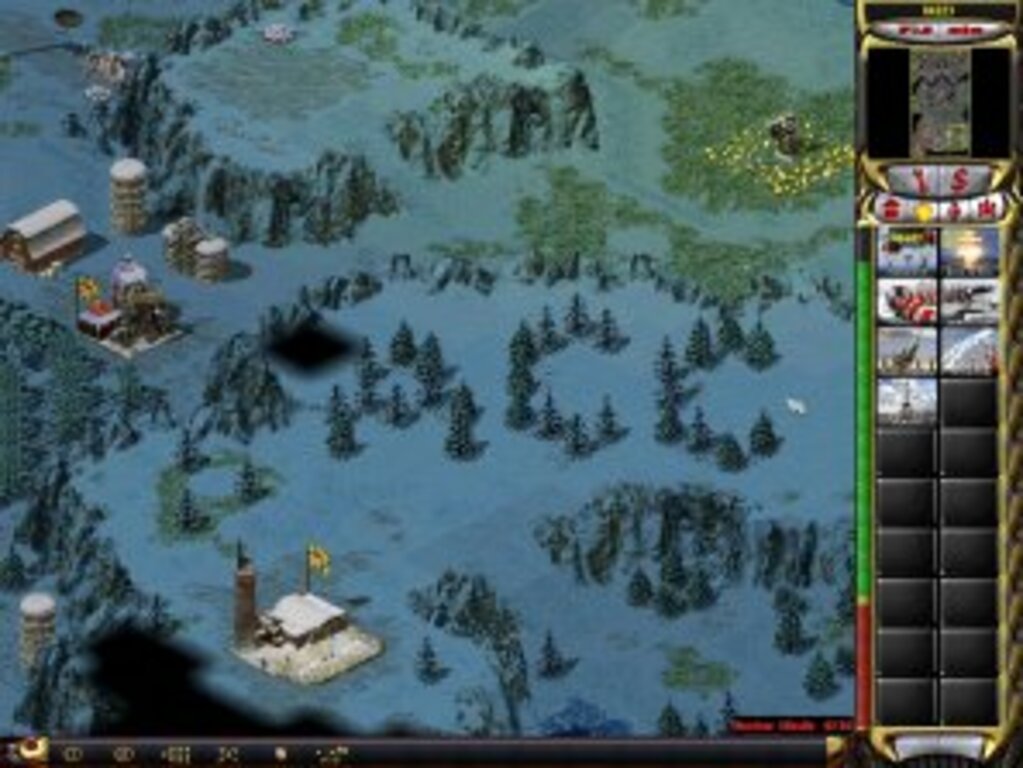
Take a look at figure 8. This is where you get if you take the East bridge. Though the area is now cleared up, it had previously four coils, a Barrack, and four Cloning Vats. In figures7 and 8, you will notice two paths: both to the bottom of the images. At the entrances of these are two coils each, so you have a brief idea of what you’re dealing with.
Taking out the Kremlin
Let’s talk business now. Take the Eastern bridge (in figure 6, its somewhere towards the top), and garrison Conscripts in the immediate building. Then, go a little Eastward and garrison another building, right in front of the other two coils. Take out the coils, and send in a Terror Drone to find the approximate location of the Cloning Vats. You’ll save yourself a WHOLE LOT OF TROUBLE if you use two Nukes and remove the four Tesla coils immediately surrounding the Kremlin. Once you know where the four Cloning Vats lie, hit a Nuke somewhere in their centre, while taking out the most Yuris, and then march in with ATs ONLY. Keep about ten Terror Drones handy, just in case some Yuris show up from the other side. The battle will be bloody, and you’ll lose at the most two ATs owing to Yuri attacks, but you’ll get through it easy, and this otherwise well protected area should look like the one in figure 8 (I just went in with ten Terror Drones and an Elite AT; you can please yourselves).
You’re almost done. Coming back to figure 6, just take the North entrance, and march right in with EVERYTHING you’ve got: Conscripts, Terror Drones, tanks, ATs, Flak Traks. Whatever. And then this side of the base should look like figure 7! The two V3s that you see are actually the ones that you get in the beginning of the game!
What now? Well, all the Kremlin has now are two Sentry guns, assuming they haven’t already been damaged by stray nukes. You can mix and match with death, now…total control.